Note: this post was originally published as a Twitter thread.
Recently I watched Cathode Ray Dude‘s videos on faxing from Windows and dialing up at home, and I was inspired to experiment with modems and faxing myself. He has a great article on configuring an ATA (analog telephone adapter) to place calls between phones/faxes/modems without a need for a telephone network. I went ahead and got myself an Linksys SPA-2102 ATA, but despite the seller claiming it was unlocked, I found that it was still locked to SunRocket, a VoIP provider that used these devices in the mid-2000s.
Below is my documentation on how to unlock a Linksys SPA-2102 ATA if you get a locked one from eBay in the year 2021. These steps are all from different guides dating back to 2007/8, but here I’ll summarize the whole thing.
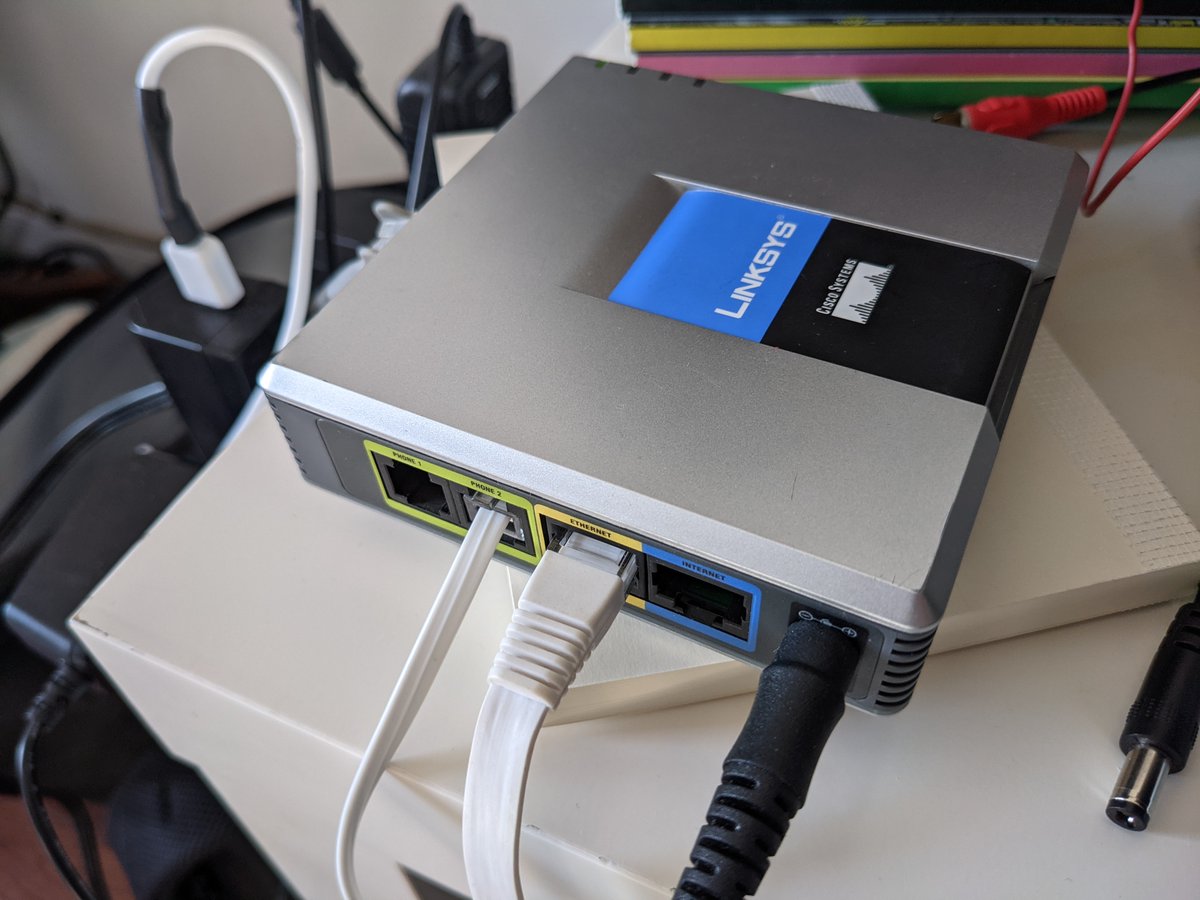
Linksys SPA2102 is an Analog Telephone Adapter. A device you can use to connect an analog (touch tone) telephony device like a phone, modem or fax, to a VoIP digital network. It is designed to work with a VoIP service like Vonage, but it can also be used locally without it. Since a lot of these devices were sold to customers by VoIP companies in the late 2000s, they were locked to specific service. Many companies went bust very quickly, leaving customers with essentially useless boxes, even though they are compatible with other services. One of these companies was SunRocket, which shut down in 2007 (they later sued Vonage accusing them of stealing their customers). When SunRocket shut down, thousands of customers ended up with locked Linksys SPA2102-R boxes

At the time, there were tons of posts and instructions online on how to unlock these devices, but they mostly relied on SunRocket using one passcode to lock the admin web interface (which had to be unlocked via a phone), and another password to access it.
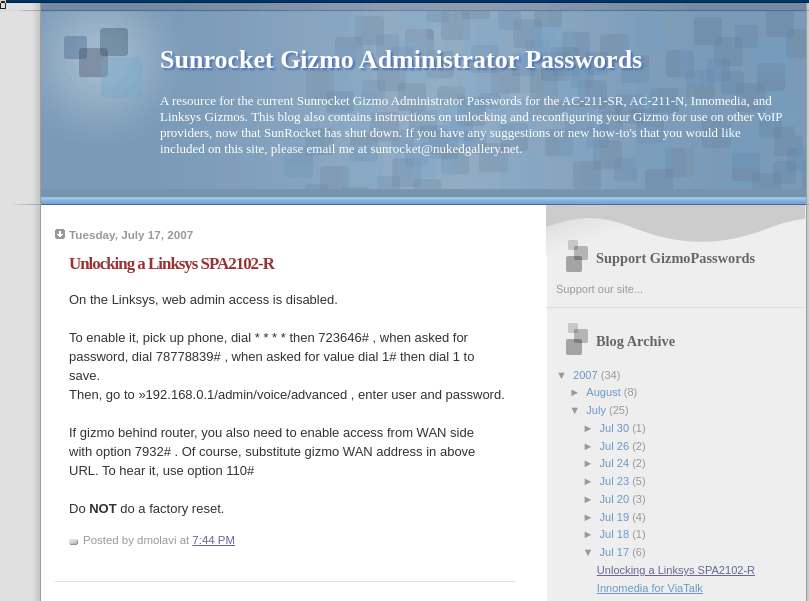
But all these solutions assumed SunRocket used just a single combination. This wasn’t the case, as they started to change them even before they shut down. So you have tons of people in comments unable to use this “exploit” since their passwords were never set to those values
So, very simply, how is a SPA2102 “locked”? There’s 3 parts. First, the admin web interface is disabled, so you can’t even enter the admin password even if you do know it. You just get a 403 forbidden error trying to go to SPA2102IP/admin
Then you need the actual admin password, to access the admin interface. And finally, you need to prevent the device from getting the configuration that locks it again (this used to be a problem in the 2000s, but it’s unlikely any of the servers are active now, mine wasn’t)
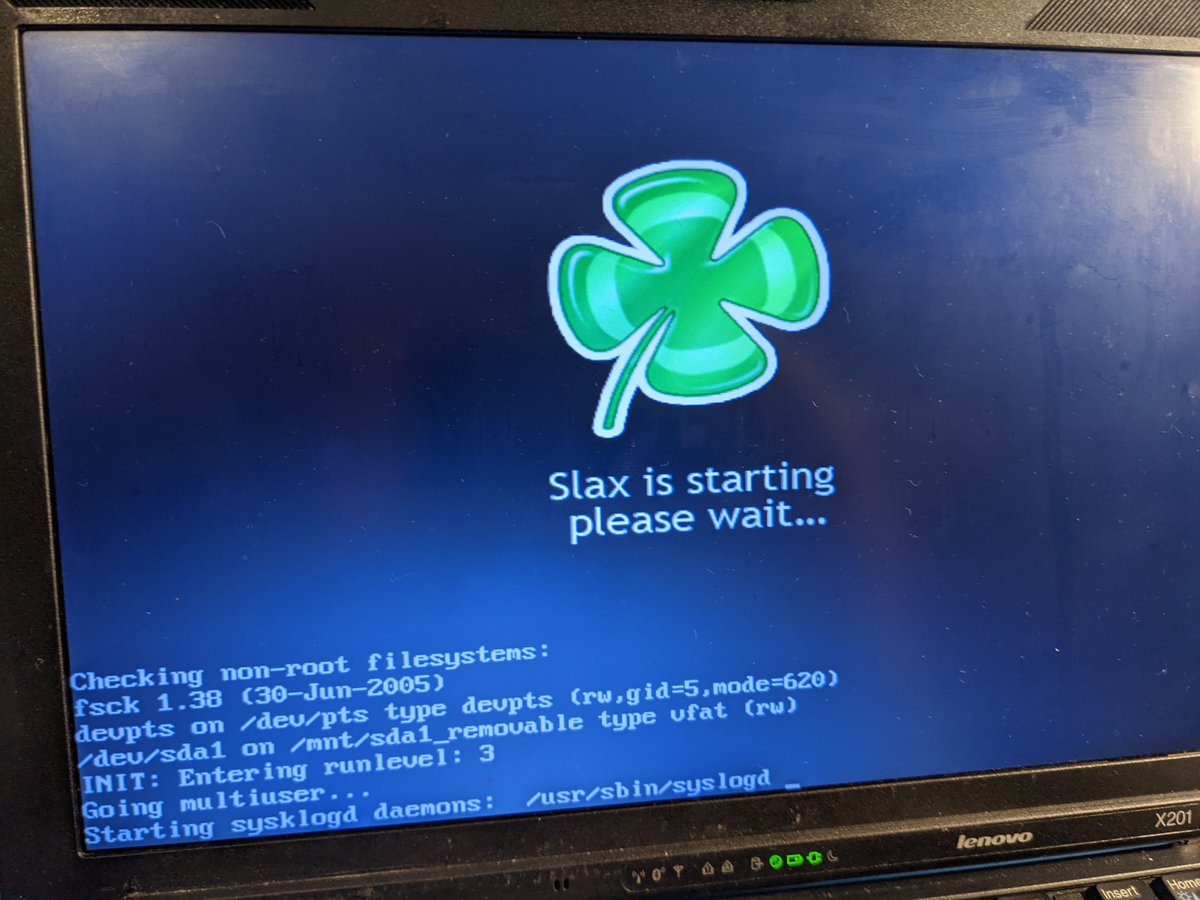
So, if you have the admin menu unlock code and the admin password, this is pretty easy. But what if you don’t? Some folks put together a live Linux CD that was supposed to unlock it for you (I tried it, didn’t work), but you can also upload a new config with the code/pw you know.
So here’s the idea. This ATA has two ethernet ports: one for it’s “downstream” LAN, where it functions as a gateway and DHCP server, and a “WAN” port that goes into your router and provides internet access. The VoIP companies would push configuration updates via this connection.
The IP, path and file name were all hardcoded into these devices. So, if you know that information (and it’s available for the SPA2102), you can set up a server that pretends it’s Sunrocket, and deploy your config with the code and pw to unlock! So here’s what you need:
- an analog phone, or ability to listen to sound via twisted pair and generate dtsm tones
- a dhcp server
- a web server
- the custom config file with a known unlock code and password
- patience
First the config file — back in the late 2000s people were not sharing this openly, but what the hell, here’s the link. Use it responsibly, and verify its safety independently. (mediafire.com/file/ebjrshliv…) This config file does two things: it changes the admin interface unlock code to 79309925, and it sets the admin password to qwe%zxc5
So now that we have the config file, we need our DHCP and web servers. I just configured dhcpd and Apache on a Linux box. If you don’t know how to do it, just look it up, doesn’t make sense to include instructions here. I’ll go over my configurations though. Disclaimer: you don’t need a DHCP server. You could technically set the WAN IP manually via the ATA’s phone IVR menu, but it’s horribly clunky so it’s easier to just get yourself a DHCP server. If you really want to do it, check the IVR codes here: (cisco.com/c/en/us/suppor…)
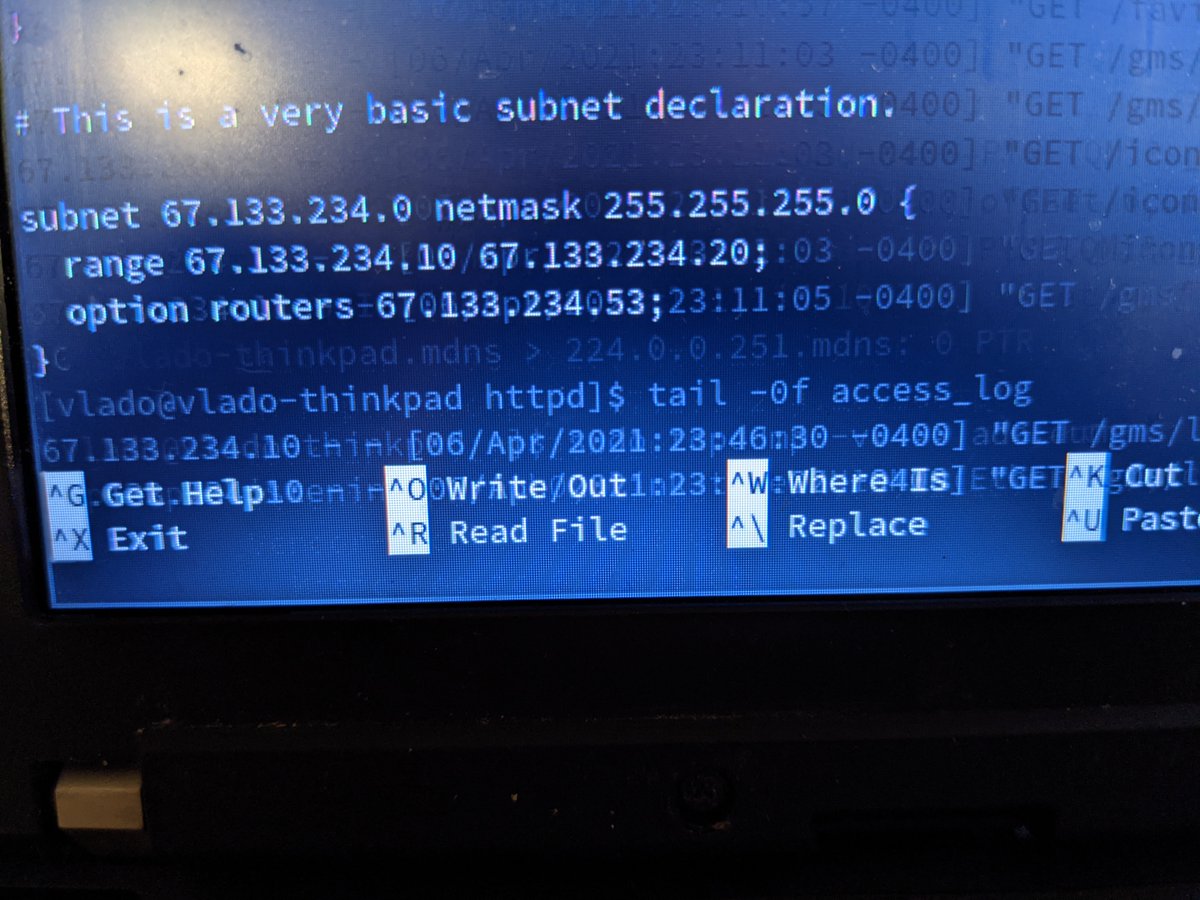
This is my dhcpd configuration. I set my computer’s NIC to 67.133.234.53 (Sunrocket’s config server’s IP), and I’m issuing IPs on the 67.133.234.53/24 subnet.
Before we move to the next step, you’ll need to get your ATA’s MAC address. It’s written on a sticker. When you get it, rename your config file to macaddress.cfg. So like 718f2e3035ae.cfg (this is random). This is because the ATA will look for a cfg file with it’s own MAC. Now we need to set up a web server (won’t go into how here) and place the cfg to the following path: ataIP/gms/linksys/SPA-2102/2102/718f2e3035ae.cfg (again this is a random MAC, you need the one for your device)
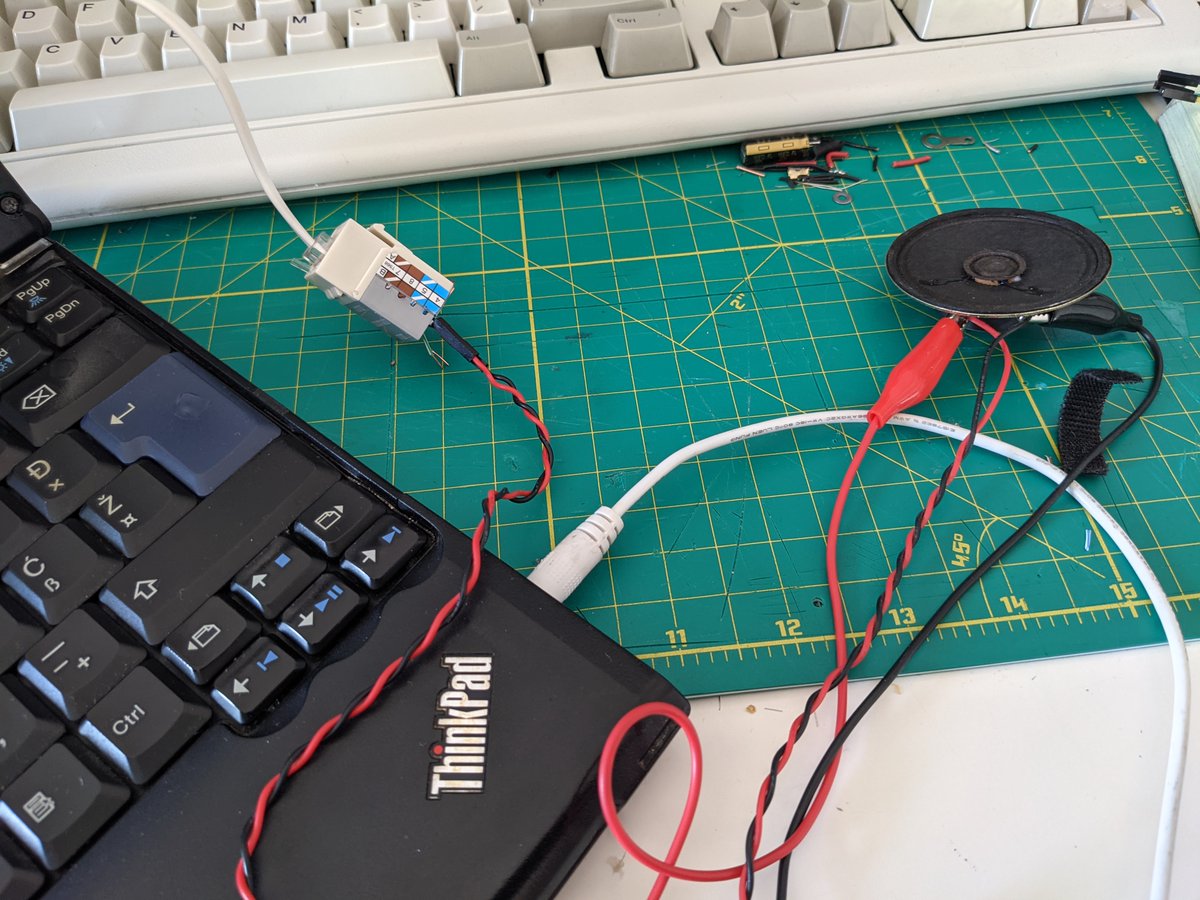
Once we have all this ready, the next step is to connect a phone to the ATA (or in my case a speaker connected to twisted pair going into the device, with alligator clips connected to a 3.5mm audio cable coming out of my computer, with DTSM tone generator website open)
Per the config (which I saw after unlocking), the ATA should look for a new config file (resync) after resets, upgrade attempts, and randomly. For me, it wasn’t doing it after resets at all. But I’ll show you how you can generate a reset.
Before you get started entering the codes via phone, connect your ATAs WAN (“internet”) port to your computer’s NIC that is set with the static IP and DHCP server. Verify that an IP on the correct subnet was issued. With a phone you can control the ATAs IVR menu (link to codes earlier in the thread). Pressing starts the IVR menu. You can enter 73738# for “factory” reset (just reset to cfg defaults). Some folks reported that the ATA would try to download the cfg after this. Mine didn’t. Instead, what worked for me was entering the wrong web enable password, and ignoring the wrong password alert. Here’s how:
- with the phone, enter * * * *
- enter 723646# to access web menu unlock
- enter 79309925# as password (probably you could enter anything tbh)
- press 1#
- press 1#
- hang up
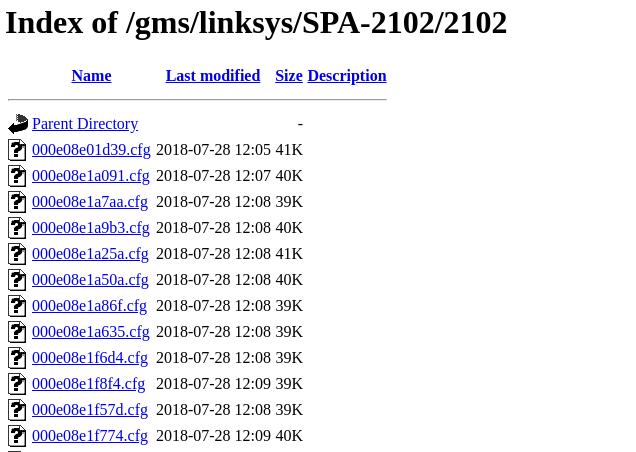
It’s useful to look at your web server access log, since that will show you when the ATA attempts to get the cfg file (the first few requests here were my test from the local machine). You can see those two last GET requests coming from the ATA (which got IP 67.133.234.10)
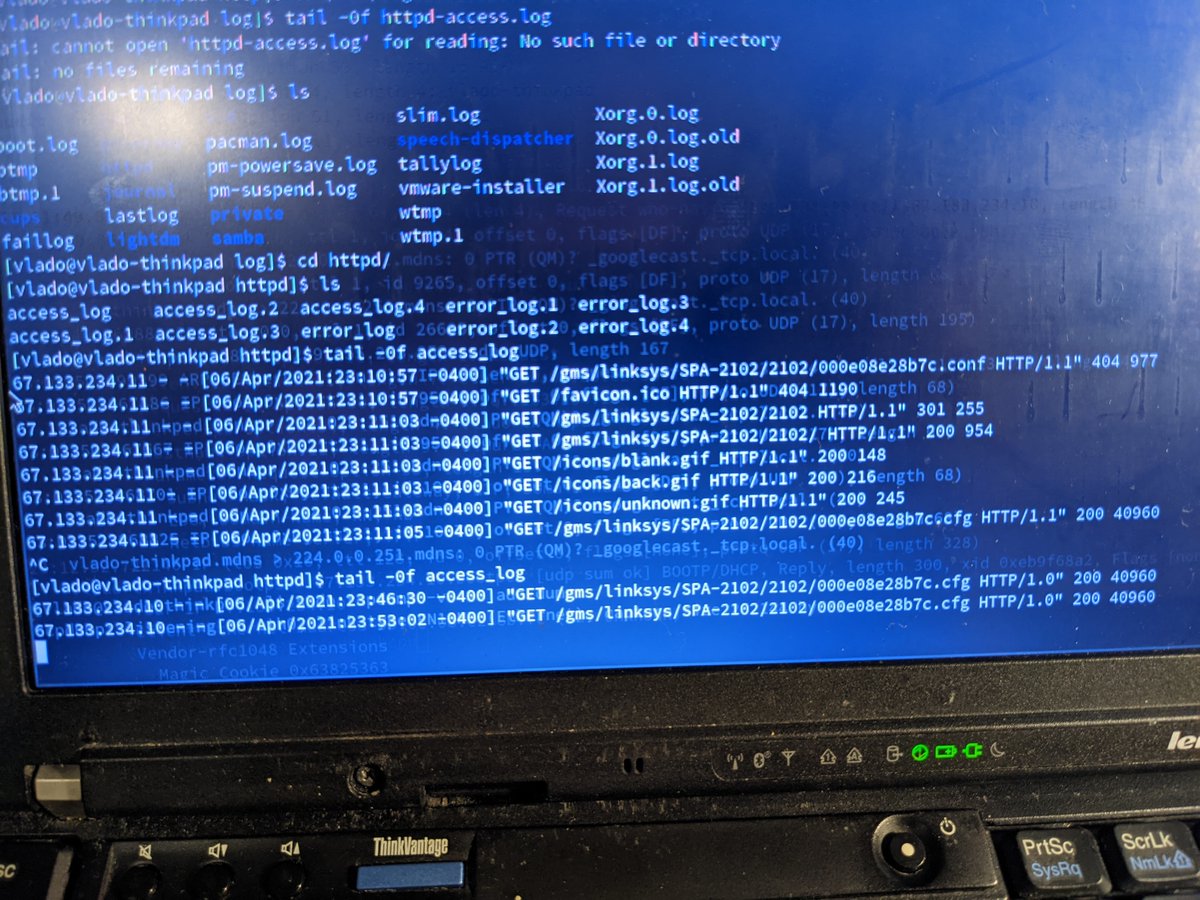
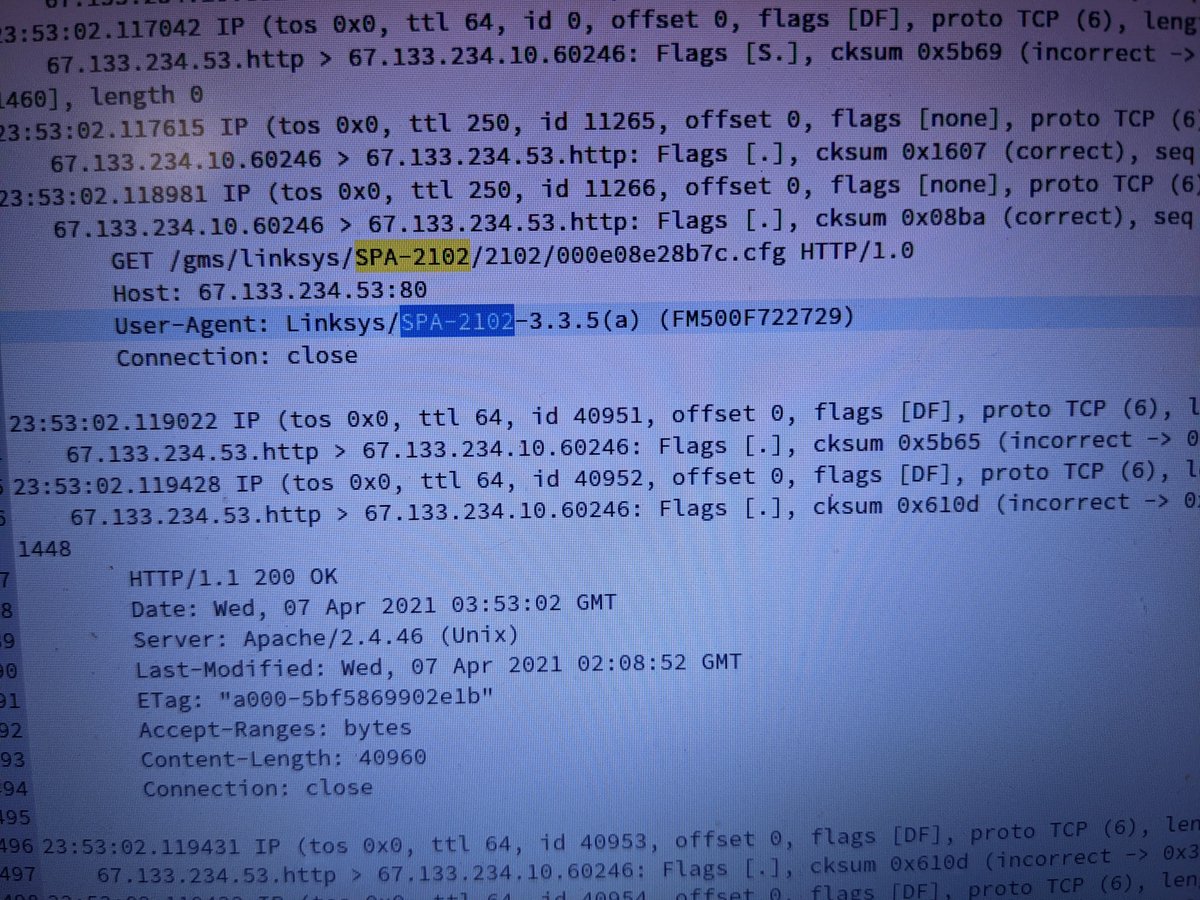
Here’s another proof of successful download. I was running tcpdump on the NIC, and these are the packets with the GET request. If you don’t know your IP, path and cfg file name, you could do packet capture like this to learn the values for your device.
So now we hopefully have a successful upload of new cfg. We still need to enable the web menu, but before we do, I suggest you unplug the “WAN” cable going to your web server (or rename the file on the web server), so that your ATA doesn’t re-grab the cfg. Here are the admin menu enable steps:
- with the phone, enter * * * *
- enter 723646# to access admin menu enable settings
- enter 79309925# password. It should now be accepted
- enter 1# to confirm
- enter 1 (without #) to save
- hang up (IMPORTANT!)
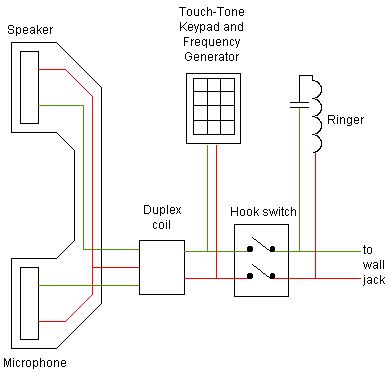
It’s important to hang up. Since I don’t actually have a phone, my line was “off hook” while the speaker was connected, and I didn’t realize it. So the settings weren’t applied. If you need to put the “phone” “on hook”, just disconnect the twisted pairs from speaker. This diagram was useful lol
Ok! Now you should see the Admin Login link in your Linksys web interface (you can access it via the yellow “Ethernet” port, it will give you an IP and be at 192.168.0.1) and you can login with:
username: admin
pw: qwe%zxc5
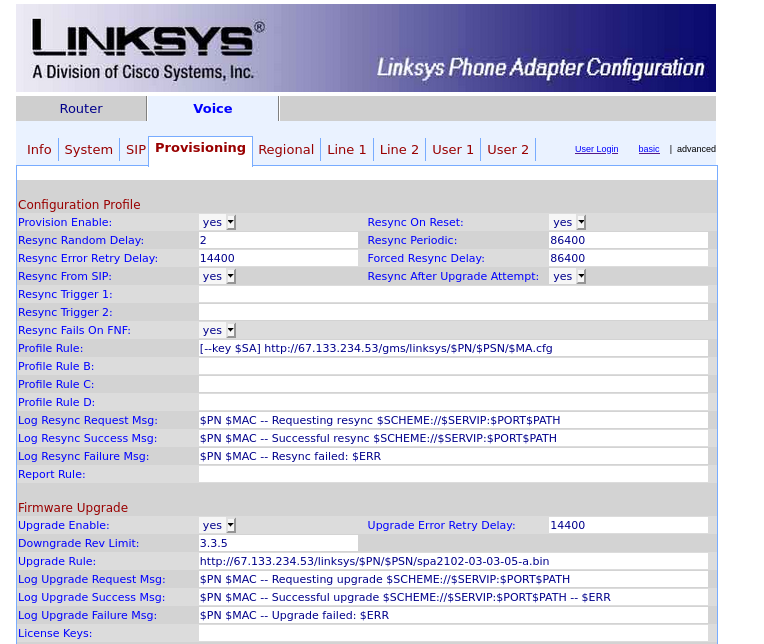
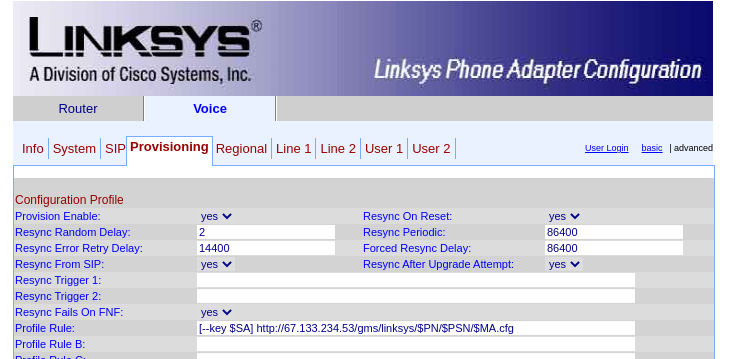
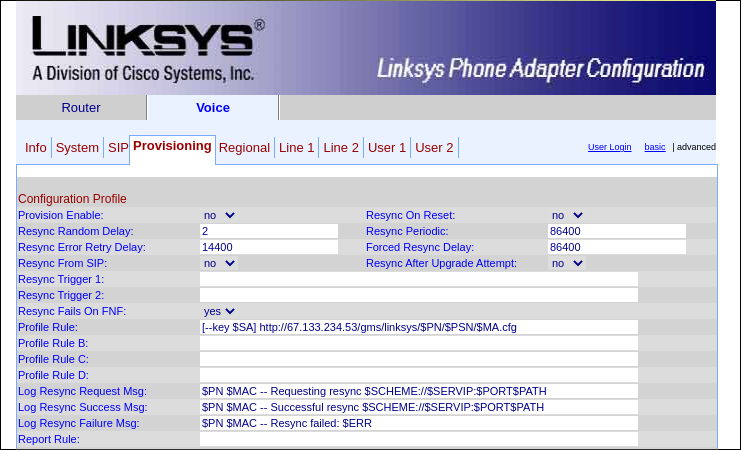
You now have complete admin access to your device. You can change SIP setting, Line settings, everything. You may want to disable provisioning to prevent download of cfgs. The server is still online, but didn’t have mine: http://67.133.234.53/gms/linksys/SPA-
To disable provisioning (download of cfgs) change Provision Enable to No.
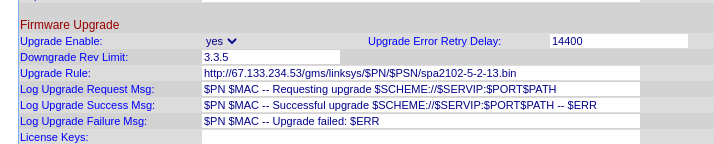
This is pretty much it. I ended up upgrading the firmware to latest version offered by Cisco (5.2.13(004)) and I used a similar web server process since their windows exe method didn’t work for me: (software.cisco.com/download/home/…)
In that Provisioning menu there is a section for firmware upgrade. It should be set to Upgrade Enable, and you can also set the upgrade URL. Important — you actually need to change the file name to something different than the firmware currently on it, or it won’t run it.
Anyhow, now I can fax and call phones (which I don’t have) and call modems within my home without any analog phone service, which is fun. I could also use this with a real VoIP service technically too. For transparency, this method mostly comes from this great video from 13 years ago. Also some steps from this archived blog post (mainly initiating the cfg download by entering the wrong admin menu password) (docme.su/doc/408123/how…)