
It’s the middle of MARCHintosh! Thanks to the unexpected GlobalTalk craze, I spent the first two weeks of March having a great time participating in the world’s first global AppleTalk network. The first few days were wild — I’ve already documented my setup to interconnect a mini vMac emulator to my SE/30 running the Apple Internet Router to connect to the rest of GlobalTalk, but as of March 16 this post is already out of date. Everything I shared there is still valid, but I’ve made some pretty big changes to how my local AppleTalk network is set up, and how it connects to others in GlobalTalk, so a new post is in order. The goal of this post is to document my setup, and hopefully help others get OnLine on GlobalTalk.
If you’re not familiar with GlobalTalk, I recommend checking out the “official” MARCHintosh GlobalTalk page as well as Paul Rickards’ Pushing AppleTalk Across the Internet post, which helped bring many folks on board in early March (including me!). GlobalTalk got started on Mastodon in February when a couple of folks (Paul and dan) started brainstorming about connecting their LocalTalk networks across the Internet. To look up that “early” GlobalTalk history, search for the #LiveLaughLocalTalk hashtag on Mastodon:

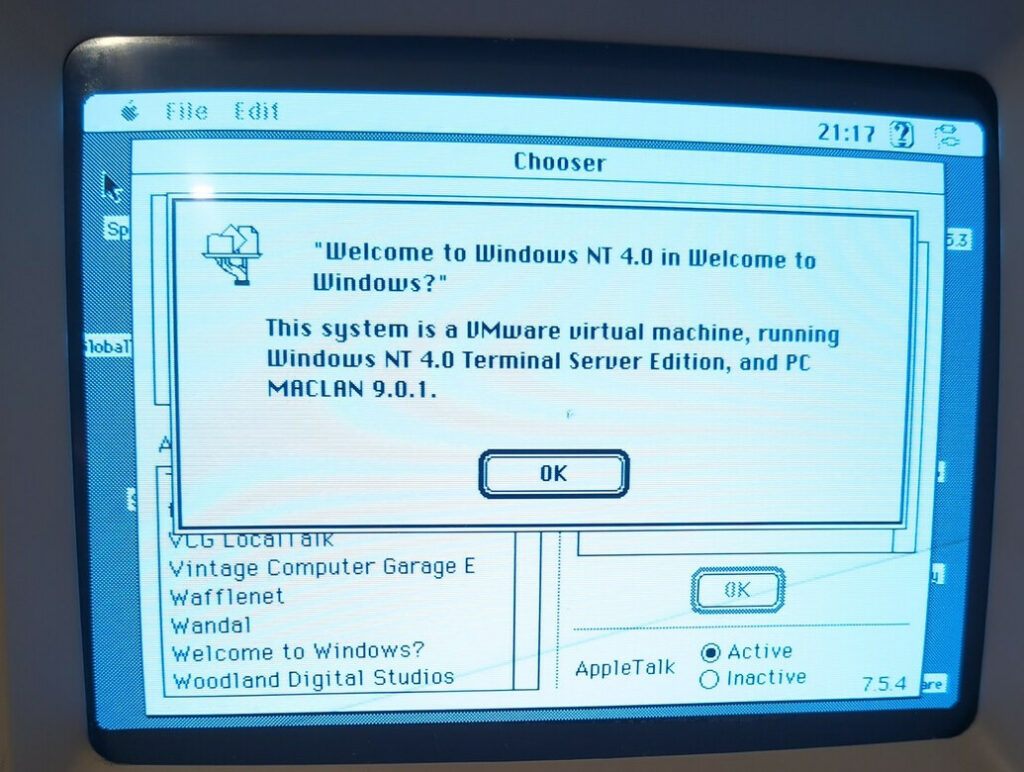
Their first attempt was to use AppleTalk VPN, but by late February they pivoted to Apple Internet Router. This was the secret ingredient that allowed rapid expansion of the network. With a list of participants’ public IPs, AIR pretty much automagically configures tunnels to remote AppleTalk zones. The most complex part of the setup is configuring your home router’s UDP port 387 outside to UDP port 387 inside to the IP address of your Mac running AIR. By now there are tons of different ways to run AIR — from 68K and PowerPC Macs with Ethernet cards and even BlueSCSI, to emulated solutions using QEMU or Basilisk II. Client machines are even more varied – there are two decades worth of Macs that support AppleTalk, from the earliest Macs up until OSX Leopard. Folks have connected Apple Lisas, Apple IIGSs, all sorts of printers (including multiple *cat printers*), Apple Newtons (inlcuding *printing from them*), countless RPis and Linux boxes running Netatalk 2.2 and even Windows NT!
In the last few weeks there have been countless creative and interesting uses of this unique anachronistic network, and GlobalTalk deserves that a proper oral history be written down. However, since MARCHintosh is still ongoing, and folks are still coming up with new ideas, I’m going to leave that for another time. My goal with this post is to share a bit about how I built the Apple Internet Router portion of my GlobalTalk zone which is called JUPAK. If you’re not on GlobalTalk (yet?), but you’re curious about what’s going on, search for #GlobalTalk on Mastodon.
Apple Internet Router (3 phases)
Phase 1: SE/30 with BlueSCSI v2
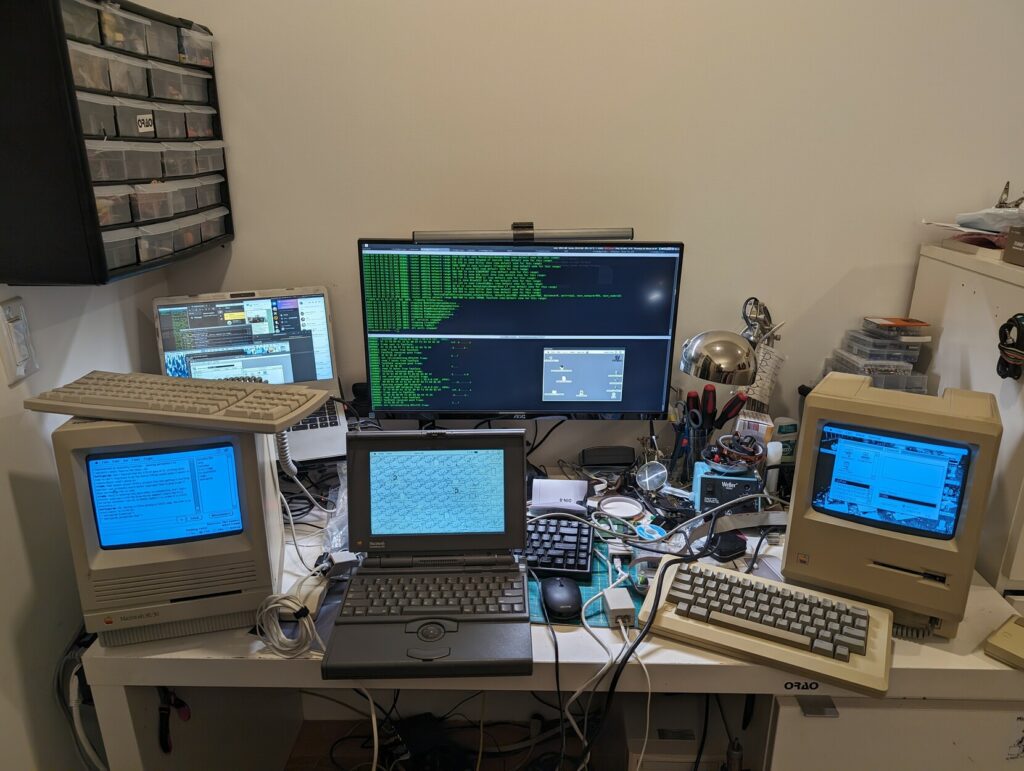
The Apple Internet Router is (currently) the core of any zone connected to GlobalTalk. I initially set up my Apple Internet Router on my recently rebuilt Macintosh SE/30. This was the early days — at this point everyone was running their AIRs with Ethernet cards, and I didn’t have one (yet!). We weren’t yet sure if solutions like Daynaport emulation on BlueSCSI v2 would work, so I first considered connecting via PPP (which would likely be unbearably slow)
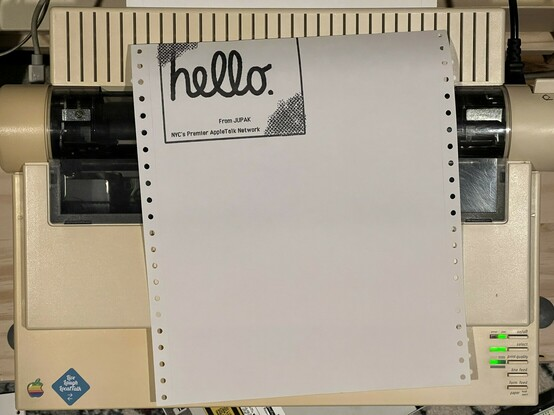
Luckily, very quickly after this I was able to get AIR connected to the rest of GlobalTalk using the aforementioned BlueSCSI v2! At this point I was using a copy of an already configured image from a Quadra 800 running AIR on System 7.1 (prepared by Paul Rickards). The setup was very straightforward — I had to adjust AIR to use the emulated Daynaport as its Ethertalk interface (it would show up as just Ethernet in my AIR) as well as the interface for the AppleTalk connection in the Network control panel, where it shows up as EtherTalk Alternative. This was enough to get me on the network and I was able to start having fun! At this point, printing to other folks’ ImageWriters was all the rage, so I immediately got on board too:
This setup worked, but I very quickly realized that with virtually no antenna and a 2.4Ghz connection, my BlueSCSI v2 was struggling and dropping packets left and right. As a temporary measure, I set up an access point literally next to the SE/30. This improved the connection considerably:
But this was still just a temporary setup, because I had an Ethernet card on the way…
Phase 2: SE/30 with a SEthernet/30 card
I was incredibly lucky that Richard Halkyard’s SEthernet project of building a brand new Ethernet card for the Macintosh SE and the SE/30 wrapped up pretty much in time for MARCHintosh, and I was even more fortunate to be one of the folks to test their new card!
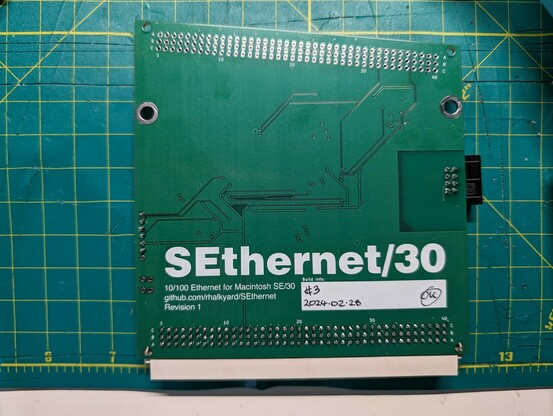
SEthernet is a brand new design that solves an all too common classic Macintosh cost conundrum – due to their current high demand, original Mac expansion cards sell for hundreds of dollars, while clones of those cards often use parts that are difficult to obtain. Richard solved this issue by designing a brand new Ethernet card around a readily available controller!
The card is built around the Microchip ENC624J600 all-in-one embedded ethernet controller. It’s cheap and available, and it plays nice with the 68k architecture. There are two versions of the card – the SE and the SE/30 version. Due to limited expansion infrastructure on the SE, it lacks some of the features of the SE/30 version.
While this is still technically a test board, Richard is gearing up for production and I recommend that you follow them, as well as the SEthernet GitHub page and the 68kmla project thread.
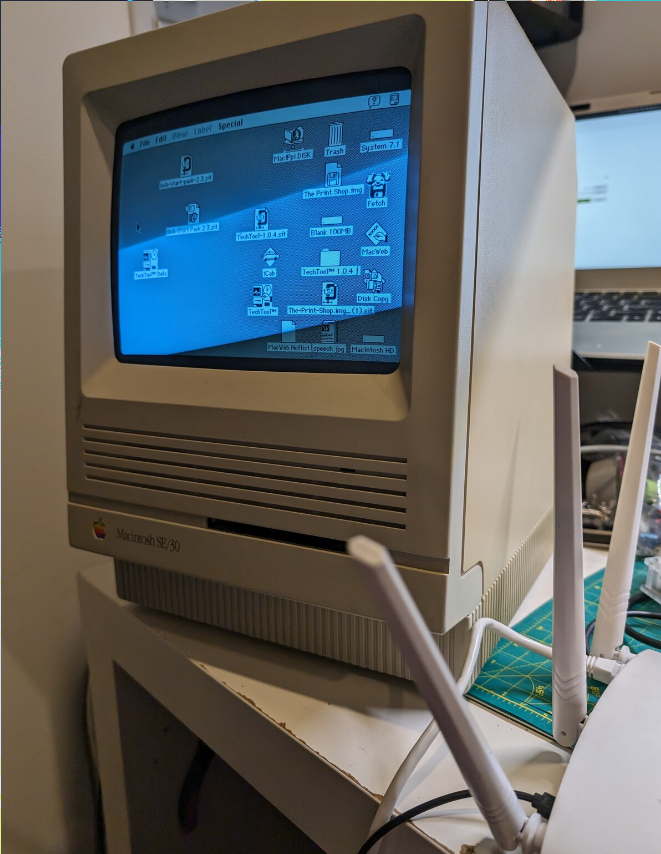
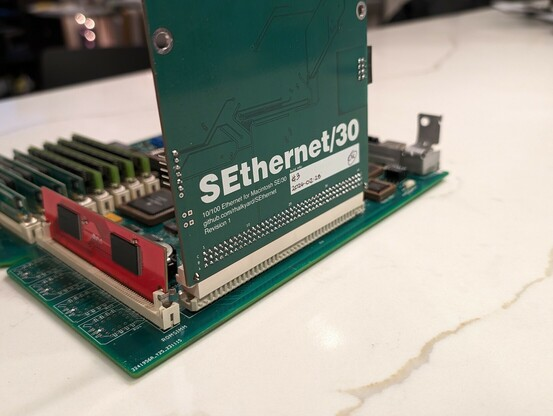
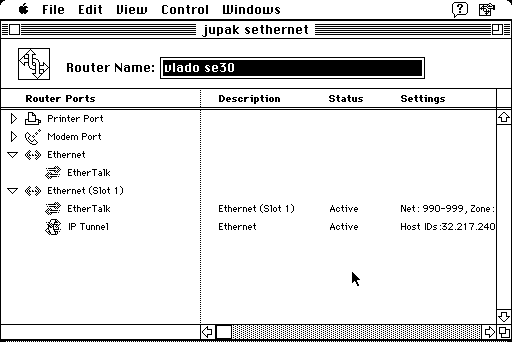
Once I popped SEthernet/30 into my SE/30 and installed the driver Richard wrote, I just had to adjust my AppleTalk interface to use the appropriate interface (EtherTalk (Slot 1)) and rebuild the IP list in AIR, corresponding to Ethernet (Slot 1)) interface.
As expected, a proper Ethernet card significantly improved my overall performance on the network! This also coincided with me getting zigzagjoe’s Booster 50-SE30F accelerator which increased the clock speed on my SE/30 to a whooping 47Mhz! The SE/30 was now a formidable router.
Phase 3: emulated router in QEMU
Once I had the SE/30 properly accelerated and equipped with an Ethernet card, my connection to GlobalTalk was rock solid. However, since most of my collection of eclectic AppleTalk machines primarily uses LocalTalk, I wanted to use my spiffy SE/30 as a client machine for chatting with folks, playing games and exploring the weird things they’ve made available on their networks. Since I didn’t have another good candidate that would run AIR (for a second I considered running it headless on another recently rebuilt SE/30 board but luckily decided against that), I decided to emulate the routing function.
While I managed to successfully run AIR on Basilisk II with UDP forwarding, such configuration can’t support routing for other machines on the network. Right around this time, europlus preparred a pretty-much ready to go package that included a pre-configured System 7.1 image and commands to run AIR inside QEMU with a properly bridged network adapter. I initially wanted to run this from a Linux host (and I still might at some point!), but QEMU network interface bridging seems to be a lot more straightforward in current macOS than it is in Linux, so I decided to dedicate a 2019 Macbook Pro to AIR duty for now.
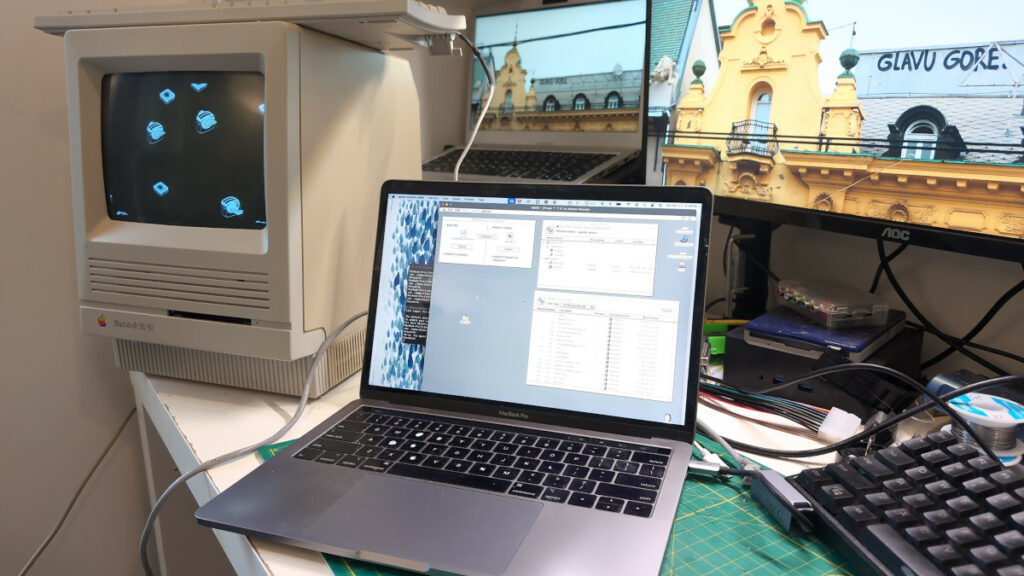
On macOS Sonoma the setup is incredibly straightforward. I got the image and startup scripts from europlus, and the only thing I had to adjust was to configure the startup commands to use my USB ethernet adapter as the network interface. And I had to update the NAT on my router point UDP port 387 to the now emulated machine. (There was also a brief nVIR virus scare where we found out that some of our system images got infected by a 30 year old virus, but you just had to be there to fully appreciate that one.)
This is all somewhat ridiculous — I’m now using a significantly newer and more expensive machine to perform this simple task. However, it does come with some quality of life benefits — I feel comfortable leaving it on all day without fear of it catching fire or breaking down (if you know the story of my SE/30 you will understand my paranoia). This means that others are able to access my shares and resources even when I’m not home. Additionally, I have easy remote access via VNC, though QEMU does have some struggles with mouse movements that take some time getting used to.
One modern struggle I have with this setup is macOS Sonoma’s insistence on putting the computer to some sort of sleep as soon as the lid is closed. I tried to overcome this by using Amphetamine but no matter what I tried the laptop still went to sleep at some point after the lid was closed. So for now I’m just keeping it open.
Next steps
I’m pretty happy with my current GlobalTalk setup, at least in terms of AIR. I don’t know how long this experimental network will last — I expect that many folks will start to disconnect once MARCHintosh is over, so I’m trying to have as much fun as I can with it right now. In terms of documentation, this is the first of a few articles I plan to publish. In the upcoming posts I will cover my AppleShare setup with a netatatalk 2.2 docker instance, as well as my LocalTalk bridge setup (including bringing my 512K online!) with the help of tashtalk and tashrouter (effectively an update to my initial setup I documented a few weeks ago). I also plan to document some of my mini projects, like the GlobalTalk hosted README file that’s accessible at https://jupak.vladovince.com, as well as my Spectre Multiplayer status page which shows currently connected players playing Spectre over GlobalTalk.